Users & seats
Users and Seats are two separate concepts in TrainAR — and two separate admin tabs in Settings.
Users and Seats are two separate concepts in TrainAR — and two separate admin tabs in Settings. My Seat is the engineer-facing view of the same thing.
| Concept | What it is |
|---|---|
| User | A person with a Dashboard login. Has an email, full name, role (admin or member), is active or deactivated |
| Seat | A workspace slot that costs a per-seat fee, holds a pair of AR glasses, and runs sessions on the glasses. A seat can be assigned to a user (or unassigned). |
A user can be a Dashboard-only admin (no seat). A seat can be unassigned (no user). A user with a seat assigned is the typical operating shape.
Users tab — admins only
Settings → Users.
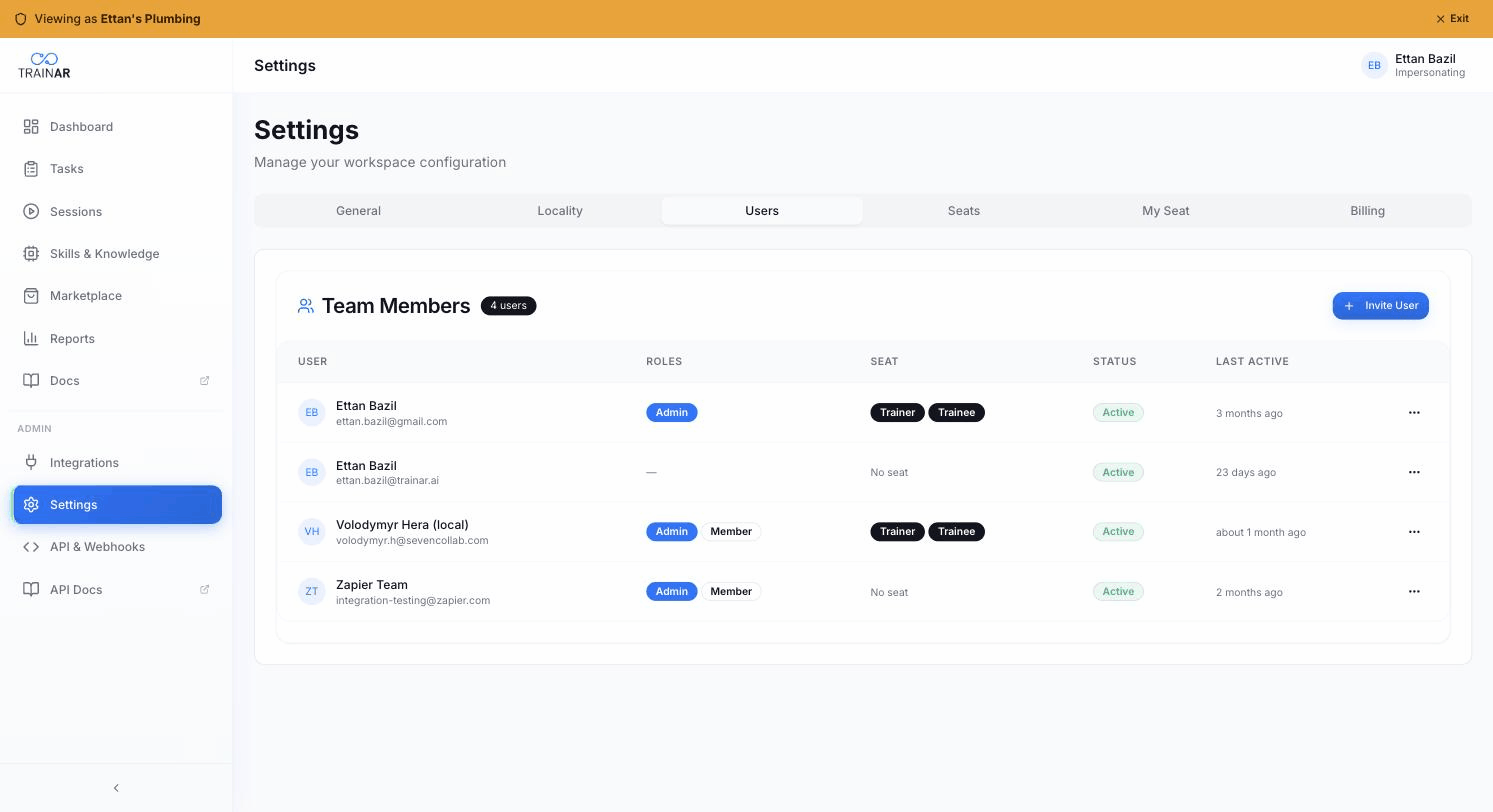
Header shows the team-member count and an Invite User button. Below is a table of every user in the account.
Table columns
| Column | What it shows |
|---|---|
| User | Avatar + full name + email |
| Roles | Pills — typically admin or none |
| Seat | Which seat (if any) is assigned to this user, with the seat's role badges |
| Status | Active or Inactive |
| Last Active | Time since last activity |
Per-row actions (admins only, on the ⋯ menu)
- Edit — opens the Edit User modal (full name, role, etc.)
- Deactivate / Reactivate — toggles
is_active. A deactivated user loses Dashboard access but their data is preserved. Doesn't free the seat. - Delete Permanently — irreversible. Nullifies the user's FK references on tasks, activity log, minute transactions, bundle allocations; drops their role and integration mappings; deletes the user record. Confirmation required.
You can't deactivate or delete yourself.
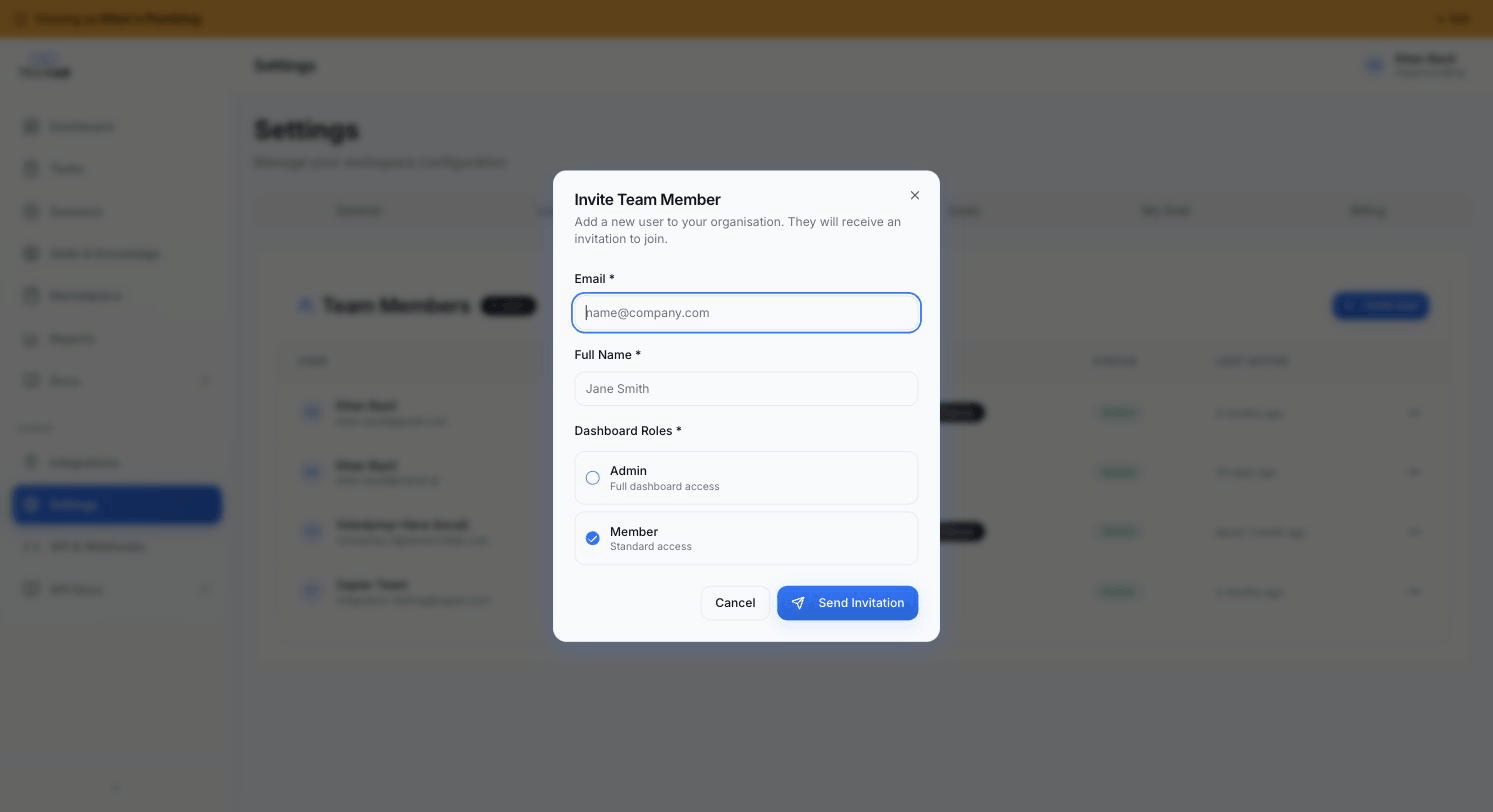
Inviting users
Invite User button → Invite modal. Email + full name + Dashboard role (Admin / Member). The invitee gets an email with a link to set their password and join the account. Invitations don't consume a seat — assign one separately on the Seats tab.
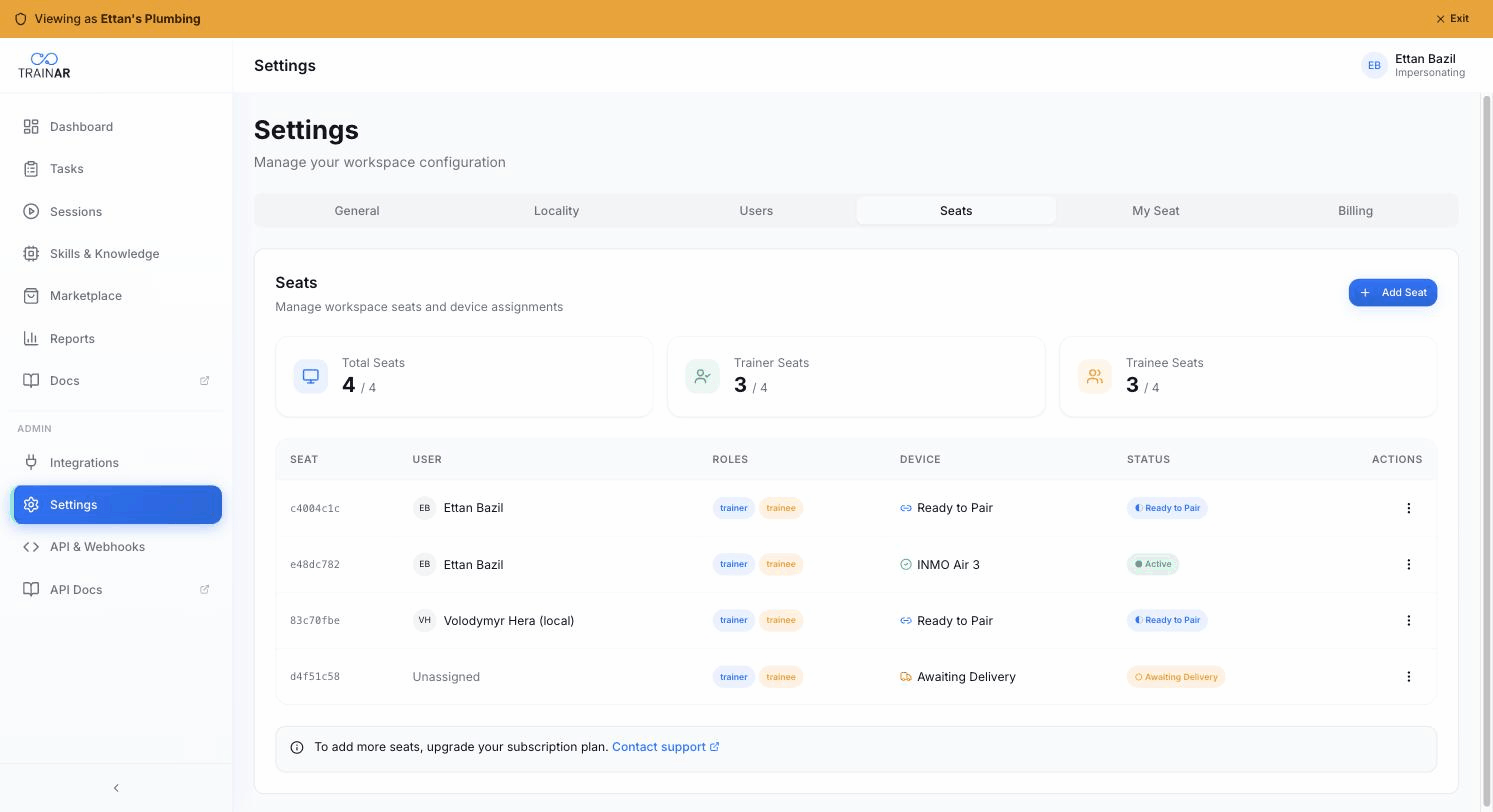
Seats tab — admins only
Settings → Seats.
Header shows three overview cards: Total Seats (used/limit), Trainer Seats (assigned/total), Trainee Seats (assigned/total — hidden for curator accounts). Plus an Add Seat button (disabled for free-plan accounts).
Table columns
| Column | What it shows |
|---|---|
| Seat | Short ID (first 8 chars) |
| User | Assigned user (avatar + name), or "Unassigned" |
| Roles | trainer and/or trainee badges (a seat can be both) |
| Device | Device model when paired (e.g. "INMO Air 3") or status (Needs Setup / Awaiting Delivery / Ready to Pair) |
| Status | Combined dot status (● Active / ◐ Ready to Pair / ○ Awaiting Delivery / etc.) |
| Actions | ⋮ menu — see below |
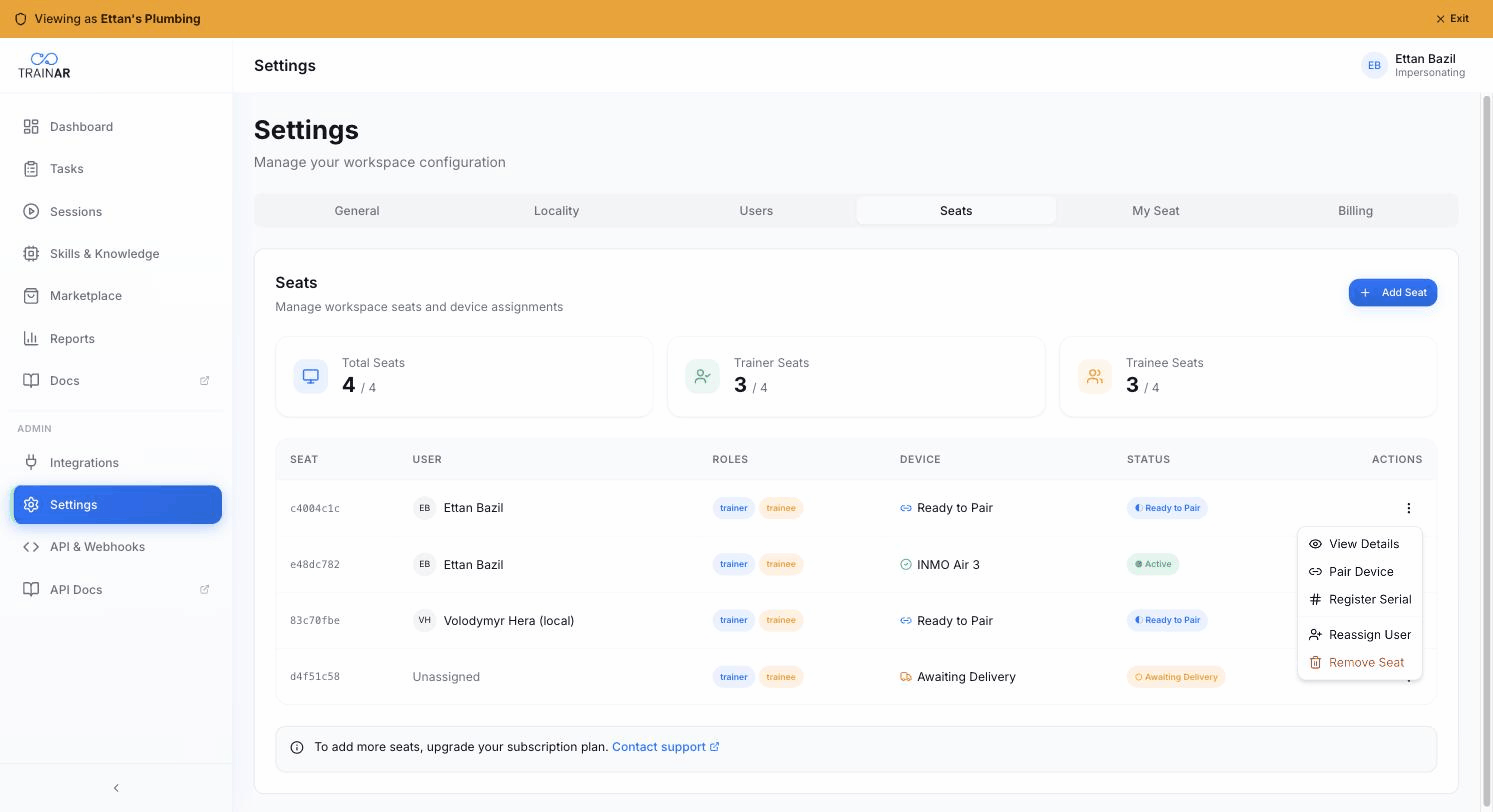
Per-row ⋮ menu
For each seat row, the kebab menu exposes:
- View Details — opens the seat detail modal (device info, pairing history, allocated bundles)
- Pair Device — opens the QR pairing flow (only meaningful when device is
ready_to_pairorbyoh_approved) - Register Serial — for BYOH seats, register or update the hardware serial
- Reassign User — change which account user the seat is assigned to (or unassign)
- Remove Seat — irreversible. If you've got an active Stripe subscription, this also reduces the billed seat count
Adding a seat
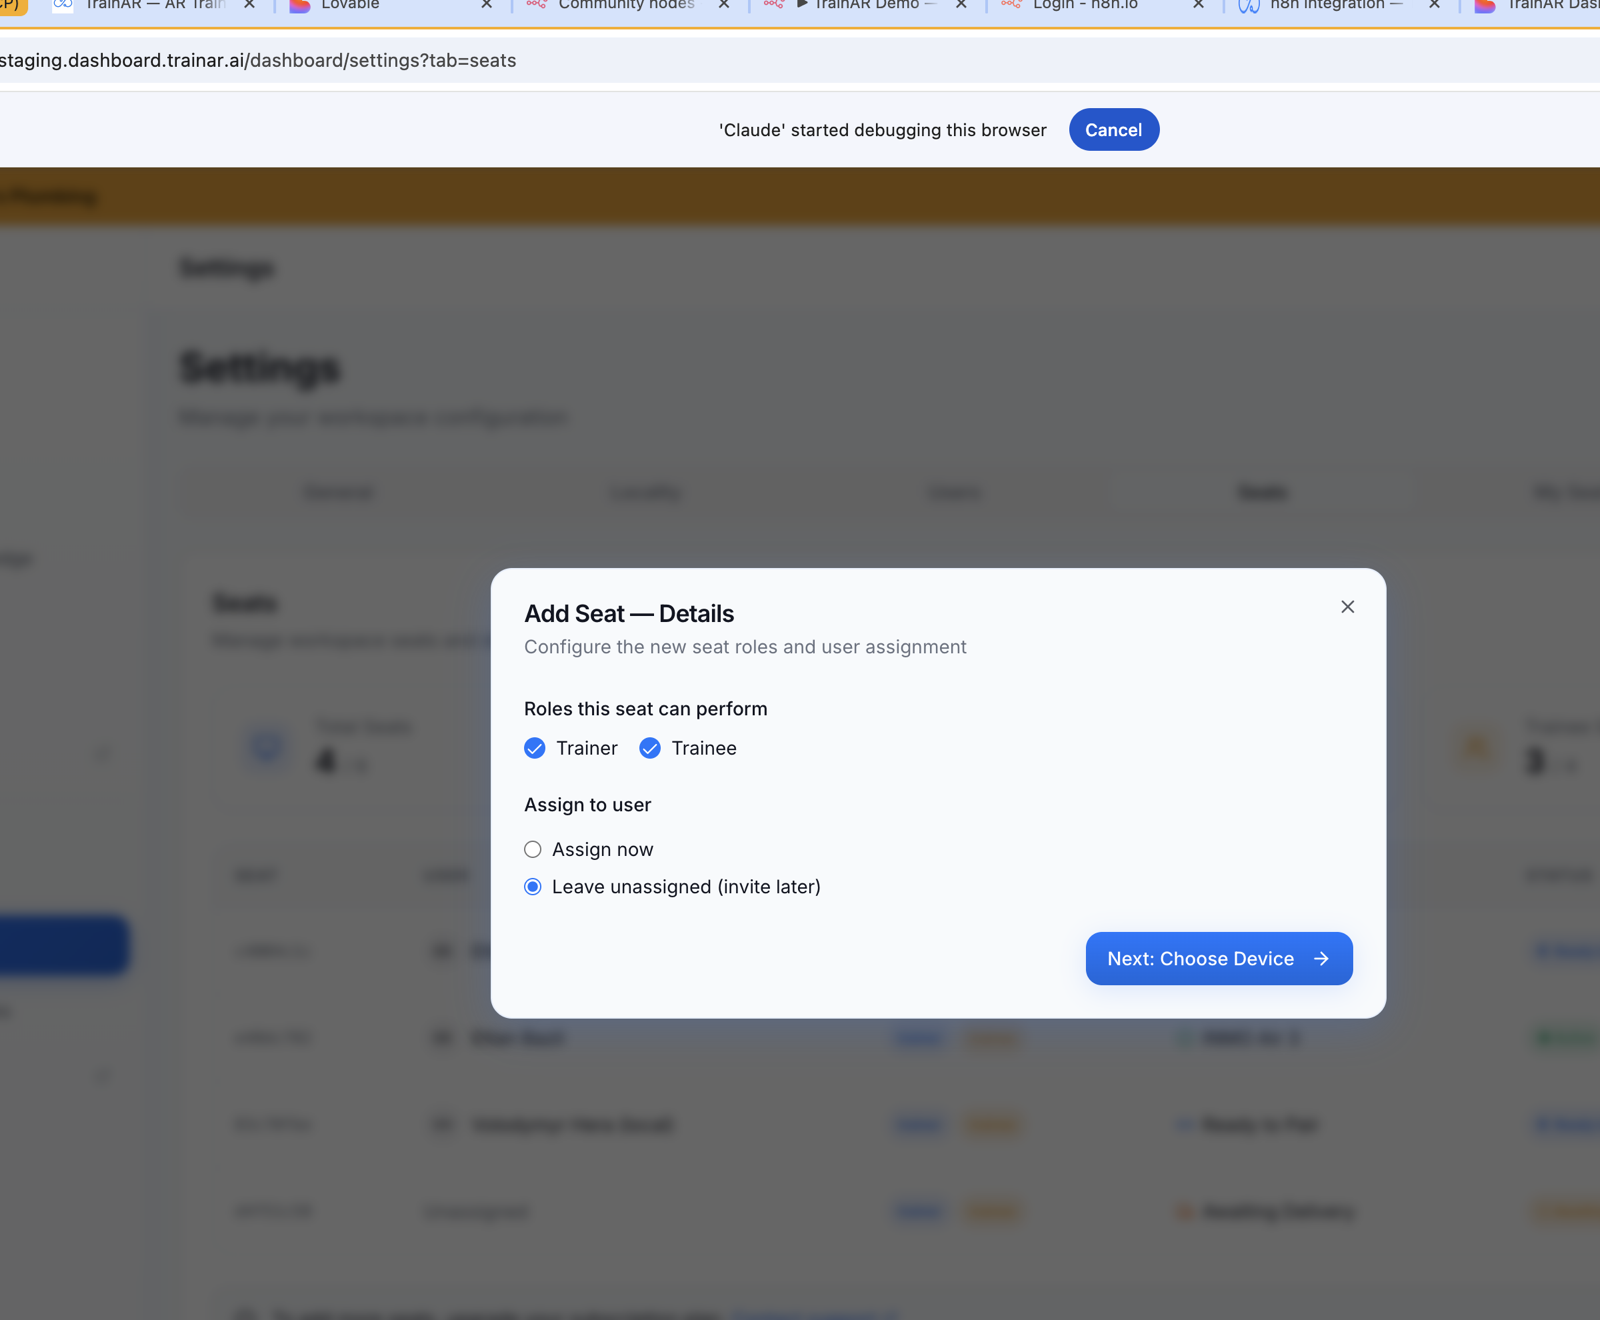
Click Add Seat. It opens a wizard.
Step 1 — Details: pick the seat's roles (Trainer and/or Trainee — both ticked by default) and either Assign now (picks a user from a dropdown) or Leave unassigned (invite later).
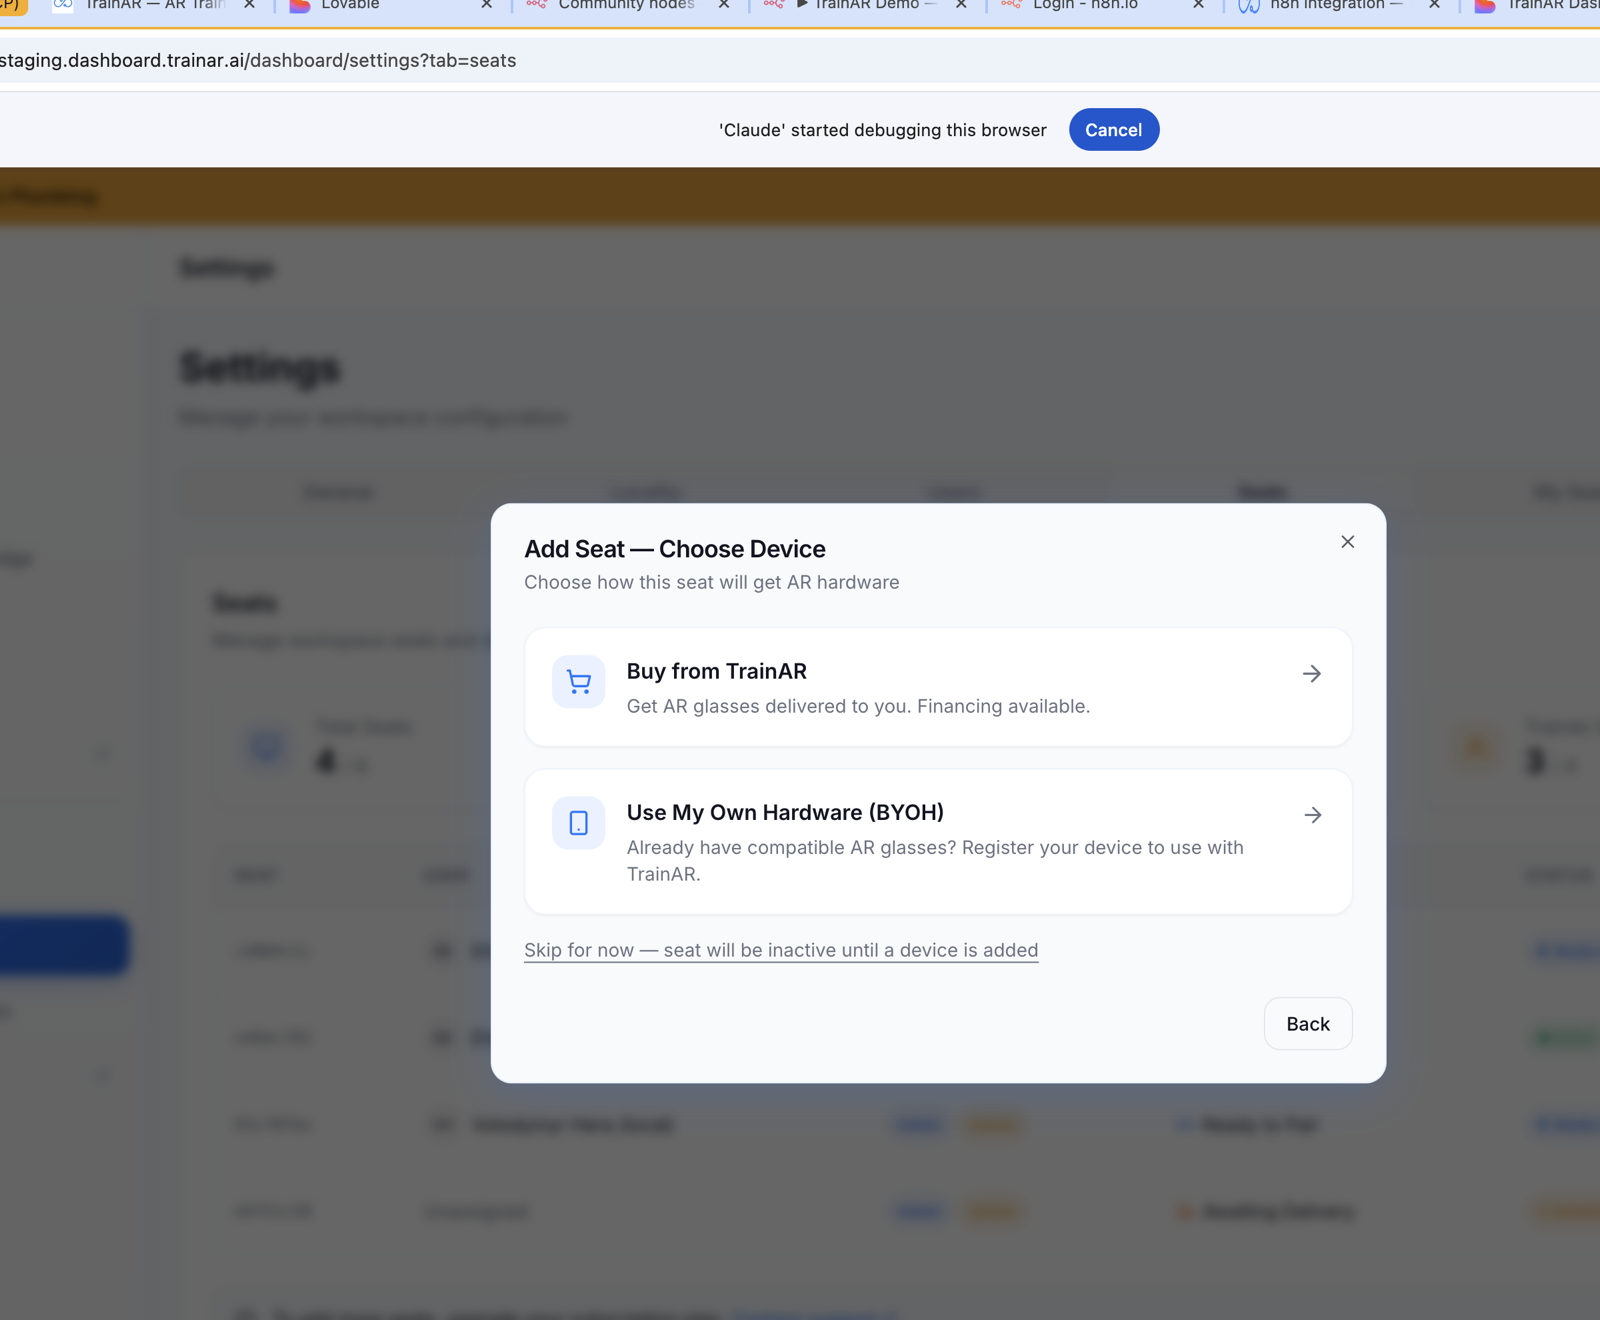
Step 2 — Choose Device: three card options.
- Buy from TrainAR — "Get AR glasses delivered to you. Financing available."
- Use My Own Hardware (BYOH) — "Already have compatible AR glasses? Register your device to use with TrainAR."
- Skip for now — link at the bottom: "seat will be inactive until a device is added"
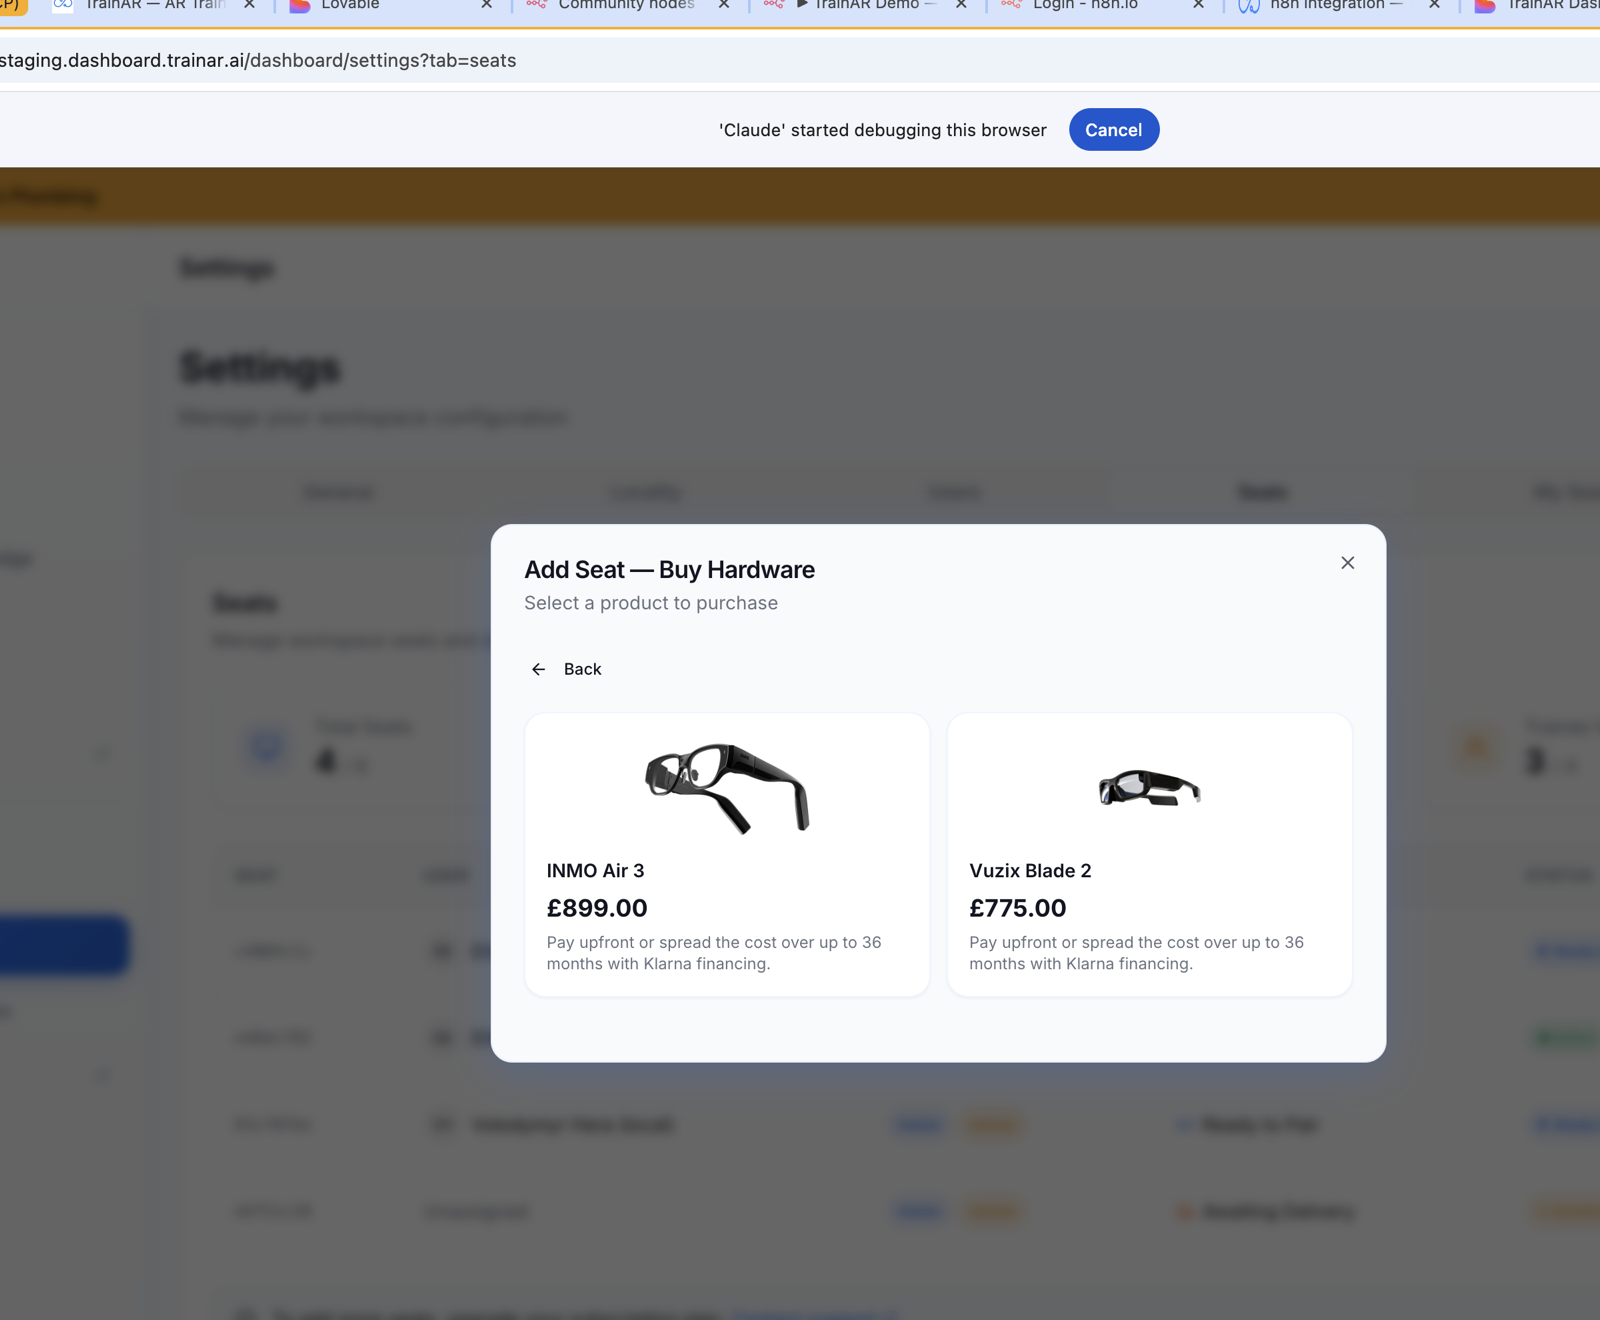
Step 2a — Buy Hardware (if you picked Buy): list of products with live price + financing. Pick a model.
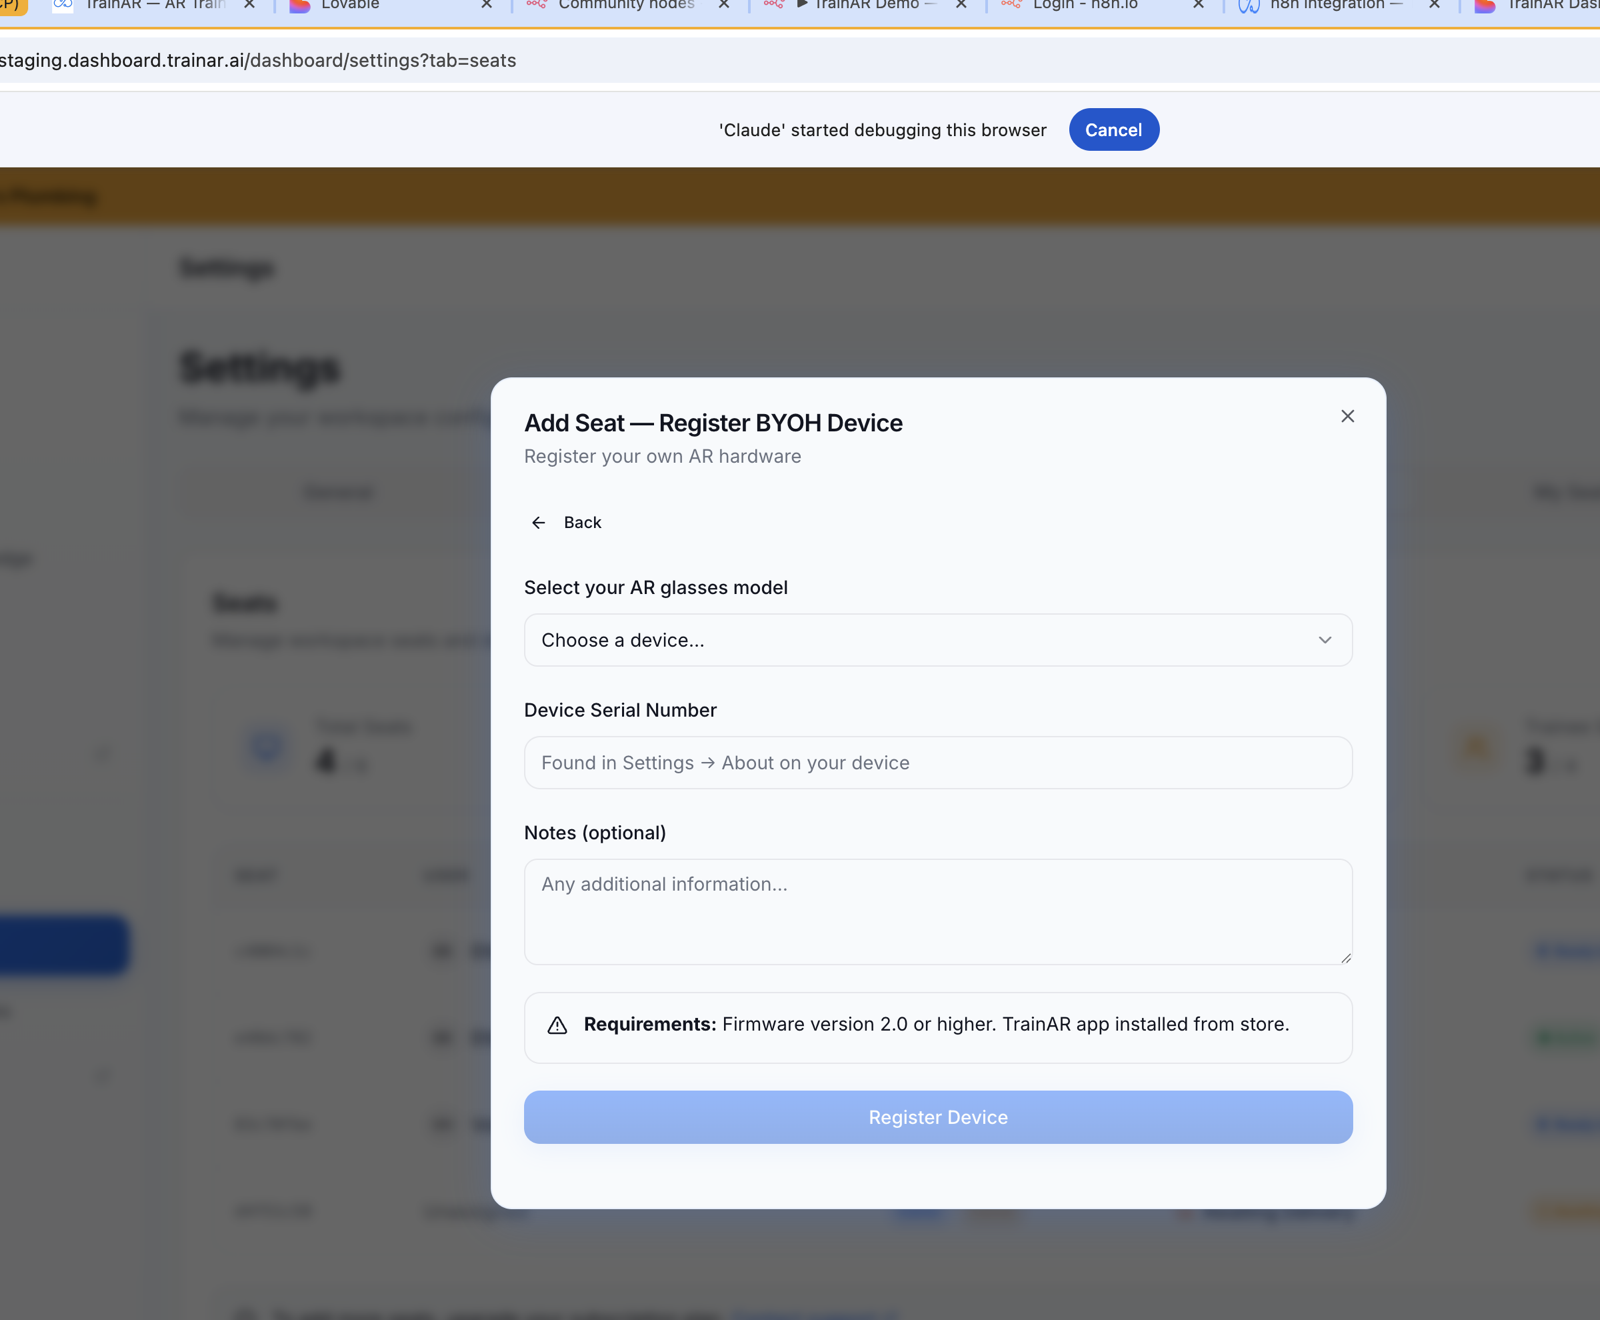
Step 2b — Register BYOH Device (if you picked BYOH): pick model from a dropdown, enter the serial (found in Settings → About on the device), optional notes. Requirements callout: "Firmware version 2.0 or higher. TrainAR app installed from store."
Step 3 — Summary: confirmation of seat ID, roles, user, device. Done.
The seat appears in the list with status reflecting hardware progress (e.g. needs_device → purchase_pending → awaiting_delivery → ready_to_pair → paired).
Add-seat is gated on your subscription's seat limit. If you've hit the limit, you see an "Upgrade Plan" toast linking to Billing.
Adding a device to an existing seat
Seats created with Skip for now (or seats whose device was removed) can have a device added later from the seat's detail modal — same Buy / BYOH choice as the Add Seat wizard. Open the seat from the table row to bring up the detail modal.
Pairing a device
Once a seat's device shows ready_to_pair (purchase delivered or BYOH approved), click Pair Device on the seat row to open the QR pairing modal. The engineer scans the QR from their AR glasses. See Pairing AR Glasses for the on-glasses side.
Unpairing or removing a device
From the seat's row menu:
- Unpair — revokes the device token (the glasses stop authenticating). The hardware is still owned by the account; the seat moves back to
ready_to_pair. - Remove seat — handled separately from device removal, see below.
Removing a seat
Admins can remove a seat from the ⋯ menu. If you've got an active subscription, removal syncs to Stripe (your next invoice reflects the reduced seat count). Free-plan seats are just deleted directly.
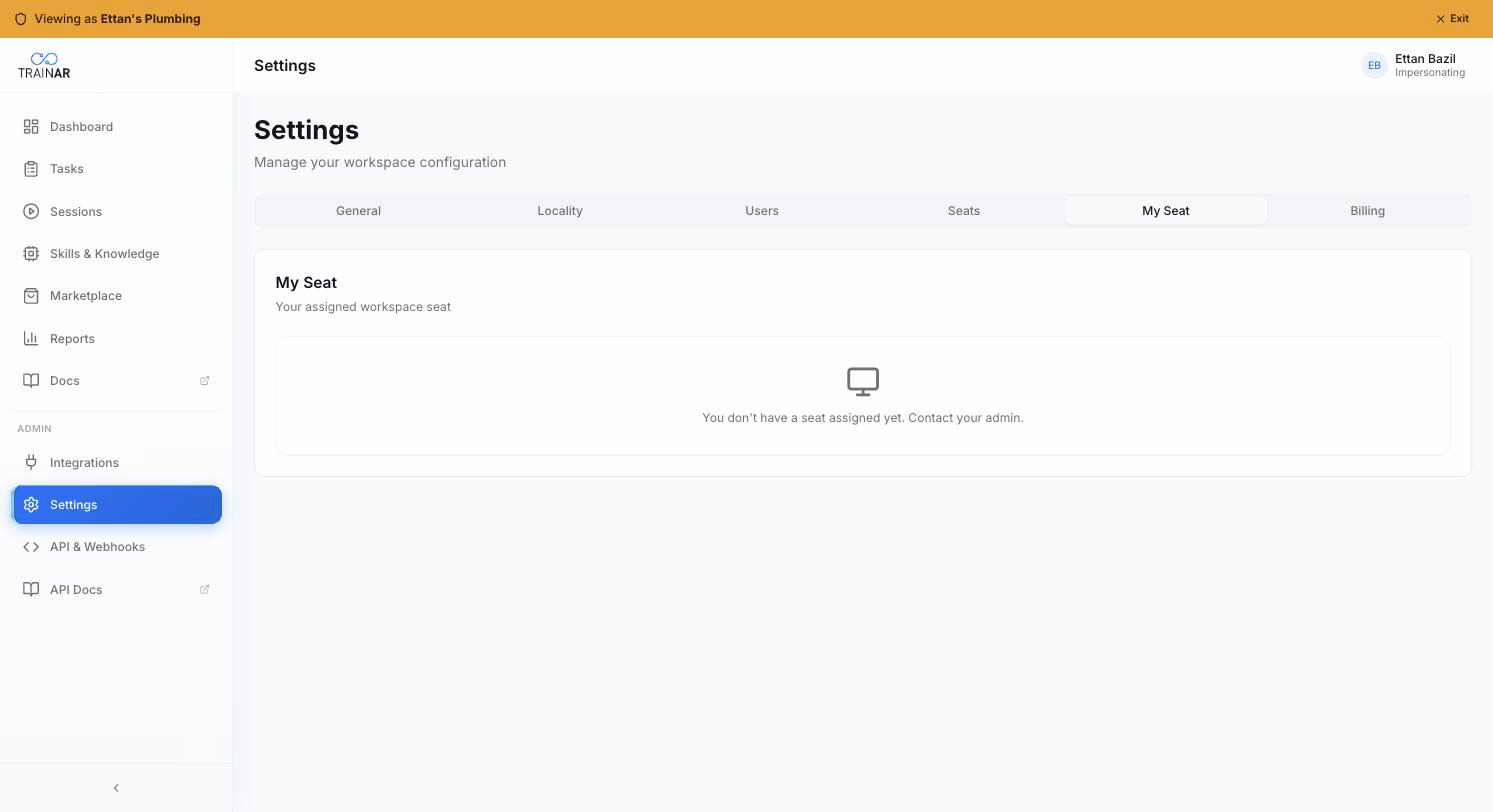
My Seat tab — everyone
Settings → My Seat.
The engineer-facing view of their own seat. Shows:
- Seat Info card — Seat ID + roles
- Device card — paired-status-aware: "No device set up" / "Awaiting delivery" / "Ready to pair" (with a Pair Device button) / "Paired" (with model, masked serial, paired-at date, and an Unpair Device button)
- Pairing banner at top when device is ready to pair
If the engineer doesn't have a seat assigned, they see "You don't have a seat assigned yet. Contact your admin."
Where to next
- Pairing AR Glasses — the on-glasses pairing flow
- Billing & subscriptions — seat limits, packages
- Settings overview — what each tab does